Ever wonder how to apply the EQ and compression to kick drums? Applying EQ and compression are one of the most important things you should consider when mixing kick drums.
As a start, the kick drum EQ settings and compression depends on the song genre. For example, your kick drum sounds different in rock versus jazz or country music. It is because of the way it has been approached in the audio mixing process.
This short guide put more emphasis on mixing of kick drums with respect to the following genres:
a.) Rock/alternative/metal
b.) Pop and Country
c.) Jazz
These are not one-size-fit-all solutions and you need to further experiment on the suggested settings to get the best kick drum sound out of your mix.
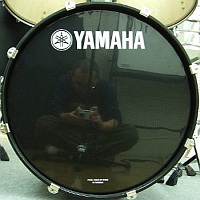
Credits: chidorian
Suggested EQ Settings for Kick drums (targeting rock and pop music genre)
Using a high quality parametric EQ such as Waves Paragraphic EQ, you can start applying the following EQ settings to your kick drum:
Cut -9dB Q=3 Center Frequency=400Hz
Boost 9dB Q=1.4 Center Frequency= 100Hz
Cut -6dB Q=1.4 Center Frequency = 50Hz
The purpose of having to cut -9dB on 400Hz is to reduce the cardboard sound of the drum and to make the drum sounds more bass. Of course since you are mixing for rock and pop music, the heavy bass guitar sound should occupy the sub bass frequencies (less than 100Hz). To increase clarity of bass guitar sounds, the kick drum is cut at -6dB, Q=1.4 at a frequency of 50Hz.
In rock and pop genre, bass guitar and kick drum should be properly mixed. This will increase the punch and overall clarity of your bass frequencies (which a combination of kick drums and bass guitar.)
It is highly important you should also be paying attention in mixing bass guitar properly to get a good sound out of your kick drum.
EQ settings for kick drum in country music mix
In country music, the overall objective of the mix is to convey a much stronger punch in the kick drum and to make the bass guitar more defined instead of making it sound heavy like in rock and alternative music.
In this case, the bass guitar is mixed above the kick drum in most cases. I would recommend the following EQ setting:
Kick drum:
+6dB boost at 80Hz Q= 1.0
Low shelf filter at 50Hz, -3dB reduction
Bass guitar:
Low shelf filter at 150Hz -6dB
+3dB boost at 200Hz

14 Responses
Awesome, thanks. Wish I could finds something like this for all the instruments in Blues.
Use your ears, not the frequency dial!
Hi Kelvin, it is better to try and find your own settings. There is nothing worse than pre defined eq’s. I had a look, but I believe it confuses people more than is good.
Nice applied some of this tricks but sure will get a better mix wen I follow all on a Live mix.
nice one bro.
Good Stuff
Hi Seto Baagh,
Thanks for visiting my blog,anyway you can find some answers relating to your problem here: https://www.audiorecording.me/how-to-record-drums-with-4-mics-drum-tracking-tutorial-adobe-audition.html
Good luck.
Cheers.
ive recorded live drum using a 4 channel mixer and 4 mics via adobe audition 3.. but the sound is not clear enough… im new to this so plz help me out…..
Hello Danny,
Yeah sure, I am planning to write a tutorial about it and post it in my blog. Please subscribe to my feeds (at the topmost part of the site, there is a form that asked for your email address), so that you can received my latest post.
It’s great to know that my tips gradually improve the sound quality of your drums. Cheers.
Hi Emerson, it’s me again.
Thanks for your inputs so far, right now I’m going to start mixing the drums. I’m excited, I’ve implemented your tips on the kick drum, snare, and hihat, so far they work quite well, each instrument sounded much more defined. Also with the panning of each instrument I decided to widen the drum kit, instead of -12.5 to 12.5 pan, I used -20 to 20, I kinda like the more spacious sound of the drum. So thank you for your wonderful blogs.
Can I ask you one more thing? Can you direct us about how to mix the toms of the drum? What freq to cut or boost to make em sound better (I know, better is a very loose term, but please a little direction would be nice).
I found that “playing” with sound is very addicting, don’t you agree?, I’m finding new things to learn everyday.. I’m hooked for life… Cheers.
Hi Danny,
I am still using the old version of Adobe version but it suits me perfectly. Sadly, there is no punch in feature in that version. What I would normally do is:
1.) If performance mistake occurs such as a solo guitar, I will delete the recorded wave entirely and asked the guitarist to re-record again.
2.) I am not sure with your setup but you can always refer to the recorded software manual in case you are confused with the settings.
It is why before I start the recording session, I need to ensure that all artists (guitarist, vocals and drummers) are completely rehearsed before doing the recording. In this case, not only it reduces the amount of mistakes but will make sure their performance is optimum.
Now I can tell you why I am not in favor of punch-in technically,
1.) Of course, fixing it can be complicated, and raw made fix can sound the recording artificial and less lively.
2.) There is some problem with volume. The volume before may not be the same volume after punching in. So a contrast in volume can be difficult to mix, adding complexity.
3.) There might be some problem with pitches. This is true even the guitars are not tuned again one day after as guitar pitching variations can vary with time, as a result, a solo might sound slightly out of tune after the punch in. Again adding some complexity if use pitch correction plug-in or re-tuning before recording.
The best fix for this type of problem is to be “better rehearsed” and “practice” before doing any recordings. In this case, a “one-take” recording always sounds best than a “punched-in” or corrected recordings. It is why audio production is different from film production. In films, you can “cut” a scene because the eye behaves like that (close and opening of eyes naturally cuts the scene). But ears are different, it needs to sound entirely continuous and natural, so a punched-in is less advisable unless you are a master of corrections that even technical listeners or audio critics cannot even noticed that there is some “punched in” at that track.
Hi Emerson, thanks for the reply. I’ll consider your advice on this matter, nice to know that you’re not only an engineer but also an artist with some cool perspectives too.
Anyway I have a question that is more related to operating the adobe audition, hope you don’t mind.
Here’s my problem, in adobe audition 3 there’s a “punch in” recording feature just like the one that I used to work with in cool edit pro 2.0. But there’s a difference and I don’t know how to fix this.
Say I just finished recording a long solo guitar on a track, but there’s some mistakes here and there along the freshly recorded track. So what I would do is highlighted the “mistake” areas and then select punch in record, right?! Ok, then I backed down the recording marker some few seconds before the highlighted areas, the idea is so that I can play along the previously recorded track and would only start recording when the marker hits the highlighted area and replace the mistakes with a new take. That’s the common practice, right?
Now here’s the thing, whenever I press the red record button I can not hear my current playing, I can only hear the original track (the one with the mistakes on it), I would only hear my current playing only when the marker hits the highlighted area and start to replace the mistakes with a new take. Now why is that?? I would like to be able to play along the original track before the highlighted area so I can have a better feel for the solo. Can you help me with this? Did I make a mistake? Did I make a wrong set up? I tried so many times to fix this, I tried playing around with the “audition mix” selection as well switching between “smart input” and “always input” but alas, no luck. Please help, I’m stuck. Thanks in advance..
Hi Danny,
It’s great to hear you find the material in this blog helpful. Anyway, the depth of each instruments can be achieved by properly setting reverb. Careful about doing this as too much reverb can ruin a mix.
So here is what I suggest:
1. In real live performance, the drums does not sound too way in the back. In fact it sounds upfront and in your face to listeners. The 80’s are notable for the long reverb and use of big stage but it is not what is sounds now. If you place your drums behind the back, it sounds too weak and your mix sounds outdated. Anyway , if this is what you like, put some reverb on the snare and drum instruments.
2. Try to experiment with reverb, if you put reverb on drum instruments, then you should not be putting also too much on guitars, or else all instruments are too behind the back. The higher the reverb, it sounds far from the listeners. Putting less reverb on guitars and vocals and substantial on drum parts, makes it sounds like the 80’s, try listening Outfield, New wave music and the way gated snare sounds on those days. Good luck.
Hello, great web. My name is Danny Bunawan greetings from Jakarta.
I’m learning to mix my demo in adobe audition 3, I read from your blog about the placement of instruments in the mix, very good stuff. I have a question, I understand that panning helps spacing your instruments evenly around the left / right axis, but what about the front / back axis, I’m talking about depth of each instruments in the mix. From your diagram it was clearly showed that the drum set is placed way back in the back ground, how do you achieve this? Do we use reverb to establish depth for each instrument? For example, listening to Guns N Roses album “appetite for destruction” , the drums seems to be placed behind the lead vocals, how can we get this in adobe audition. I’ve been playing around with the reverb option in adobe audition, but I am at a lost, too complicated for me, can you maybe help us by writing a blog about front/back “placement” for mixing? thanks and keep em blogs coming, learning a lot.