The final result in mastering is the finished master in highest resolution (e.g. 24-bit/48KHz or better) and CD audio master/MP3 master for distribution in 16-bit/44.1KHz resolution.
3. Good monitors with subwoofer, flat as possible. If you are in budget and looking for quality/flat frequency response monitor for home studio, you can read this post on the recommended studio monitors. You can have decent monitors for mastering starting around $300. Studio monitors for audio mixing can also be used for mastering.
4. Good acoustics, know the response of your room acoustics very well. Read this article to learn how to test your room acoustic response. . If you haven’t started treating your rooms, you can read this tutorial on home studio setup acoustic design.
Quick Steps/Procedure on Mastering your Tracks
1. Start with cleaning the tracks, you can remove noise, shortening gap in the beginning and ending. Read this guide on mastering for CD audio.
2. EQ, add presence like +2dB in 2 kHz, +1dB in 1 KHz and +1dB in 4 kHz. Q is 1.
3. EQ part 2, remove mud sound, by cutting -3 dB in 200Hz (use Q of 1), -3dB (high pass filter action) at 35Hz.
4. EQ part 3, add bass and lower punch for more pop and rock sound (not applicable for jazz and country genre). If at mixing, kick is boosted at 100Hz, add +2dB in 100Hz, +2dB at 65Hz. Use Q of 1 for this.
5. Final EQ, add gloss and shiny sound, boost at 15kHz, Q =1.0, +2dB.
6. Apply low pass filter at 16500 Hz (this will pass everything below that, and severely attenuates above that mark). This is optional.
RECOMMENDED: For more tips on achieving the desired tonal balance on your audio mastering project, you can read this very useful tutorial on typical EQ settings during audio mastering.
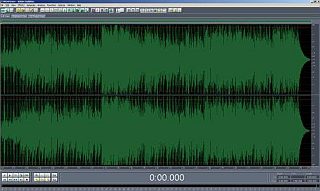
7. You can finally apply a brick wall limiter, I use L2 Wave effects, compress so that the average RMS audio level is around -13dB for pop and rock volume average. Read this guide if you are not familiar about RMS.
The resulting wave should look like a mastered wave, such as shown above.
8. Save your work, and DO NOT DESTROY THE ORIGINAL MIX DOWN (unmastered track) from the mixing studio. Listen always. Use your EARS! This is the most precious studio equipment. If you have some weakness in sharp listening, you need to undergo some ear training development exercises designed for mastering engineers.
9. Finally criticize your work, open up your audio player, add commercial tracks similar to the genre you are mastering, and then add your mastered track…Does it sound different? Or sound competitively similar? Repeat the whole process if it fails the test. Use your ears to tweak those settings.
10. Always keep the highest resolution finished. This will be your source material when you want to distribute your tracks in CD audio (see Red book tutorial link above) or distribute your tracks as MP3. You should also know the importance of dithering and sample rate conversion processes which are required when you will be distributing your masters to the public (e.g. such as an album or single release). Hope this helps a lot!
Content last updated on October 22, 2012


30 Responses
Wow just found this site so much helpful info on this. Thanks.
Hi Emerson,
Your recording site has been such a great help over the last few years. Thanks.
I may not have looked at the right tutorial, but just wondering what type of .wav file I should save my final mix to before mastering. In Adobe Audition the options are A/mu-Law Wave, ACM Waveform, DVI/IMA ADPCM, Microsoft ADPCM, or Windows PCM. All of these have their options so slightly confused. I had been saving as MP3 until I saw one of your tutorials saying not to.
Many Thanks,
Chris
Hi Mozes, thanks for the suggestion. I will look into this one. Please subscribe to the site feeds to get the latest update on published posts. Cheers.
Hey buddy give me tips to EQ and compression for death metal and black metal genre..I hope you will.
Thank you!
You are the great audio engineer.
Thank you Emerson,
Your response and other content on your site are very helpful. You’ve confirmed some of what I already do. The article on CD burning offered good explanation and reasoning for using the slower write speeds when burning CD masters; information that will answer questions my superiors here have asked. Thanks again.
Hi Ed,
The typical process is to burn the 16-bit/44.1KHz audio WAV (assuming it’s been correctly dithered and processed by the mastering engineer) to CD-r (high quality CD-r). The burning speed is typically slow around 1x to 4x.
This will result to less/negligible jitters that could make the CD master to be rejected by the replication plant. You can read the following tutorial for more information:
https://www.audiorecording.me/best-cd-burnerwriter-media-for-burning-audio-mastering-cd.html
https://www.audiorecording.me/how-will-you-prepare-your-master-recording-for-delivery-to-your-client.html
Thanks for visiting the blog! Cheers.
This is a great site, one I shall return to for reviewing a lot of the material. I work at an audio/video duplicating co. Most of the audio discs received are duplication ready. A few, though, I need to extract to PTLE6 and do some minor editing/mastering.
One question I have not seen addressed is how is the final master transferred from PC to disc. Do you master to a disc using a CD-r, such as an HHb CDR-850 (which would be in “real time”), or do you burn the master disc using a program like JAM or Toast?
The gist of my question is, what is the preferable burn rate for creating a master cd: 1x, 4x, 16x or higher? Some time ago I read that 4x should be the rate for burning cd’s for use as replicating masters. And that’s what I do now when I have edited in PTLE6. I convert to a 16/44 wav file then use JAM to burn the final master. Your thoughts/advice would be appreciated.
Alton,
If I understand you correctly; CD is 16-bit/44.1KHz. No you should not be doing your mastering at this resolution. I suggest mastering based on the original source as what I’ve said before. You can create original copies of your DAT to your Mac and master in Garage band as what I’ve advised before. Once inside your Mac, there will be no wear and tear on your DAT. Good luck.
Hi Emerson,
Don’t want to bug you, but I have a relatively simple question. I’ve been running the DAT to listen to the mix. I haven’t applied any outboard gear or EQ yet. I’ve just been listening to it compared to a commercial release that I think is similar. Since DAT is still tape (and fragile), could I burn a CD, plug the CD player into my mixing board and make mix/mastering choices based on the CD as my audio source? Would there be a frequency issue? So the DAT comes out of the equation, and I keep playing this thing from the CD until I think I have it right with no wear and tear on the DAT and when I think the EQ, reverb, FX settings, etc. are right I’ll record it in GarageBand. Make any sense? I’m a little concerned that the DAT might just give out at some point. Not the machine, but the actual tape. Thanks again for your help. Be well.
alton
Hey Emerson,
Thanks for that last bit of advice. I just finished patching up the outboard gear and am about to give the mix a try. The only processors I’m using will be a DigiTech Studio Quad for the overall reverb/ambience, a BBE Sonic Maximizer for sparkle and an Alesis 3630 compressor to make sure nothing leaps out of the mix (in an undesirable way). I’m going to listen to it dry and work with the Mackie’s EQ to see what can be improved and reference it to a similar recording. Thanks for all of your good advice. Be well.
alton
Yeah it sounds like a good plan. About the quality of connecting to Mac I/O port; ensure that the digital resolution (bit depth and sample rate) transferred to your Mac (via the I/O) should be exactly the same as the one in your DAT which can either be 16-bit/48KHz, 24-bit/96KHz, etc (depending on the quality of your digital audio tape). This would preserved the digital recording quality after being transferred to your Mac. And ensure that during the transport there will no alteration on the digital signal (dithering, etc). This would also preserve the original recording.
I never tried doing this before as I never use Mac in the recording, mixing or mastering. But I think what I’ve outlined above are basic/fundamental concepts in preserving digital quality from one storage medium to another regardless of digital platforms or OS. Yup, I’m here in the Philippines. Thanks for visiting my blog.
Super! So, I’m somewhere between what you and I have both talked about. I’m going to put up the DAT and run into two channels of my board panned hard left and right-I don’t think this old version of the Mackie 1604 VLZ board supports digital I/O (although I love the board). I’ll use the aux sends and returns to sweeten the mix with FX, the board EQ and then go into stereo tracks on GarageBand. That, I think, will be my “master.”
I use the audio line in/optical digital audio port on the Mac to get the sound from the mixer to the Mac. Is that an issue sonically going from the board to the I/O port on my Mac?
Anything else I’ve not thought of, forgotten, need to bear in mind? You are a great resource and I thank you. Where are you located? Talk soon.
alton
Alton,
Anemic waveforms are not that bad as long as they sound clean (no noise) and full of dynamics. Since you do not have the original tracks to mix, you cannot really remix them anyway. So you are left with mastering as the only process to enhance the recording quality of your song. Since you have them in DAT, you can import them to Garage band. I’m not a Mackie board user, but the signal chain devices could be as follows:
DAT – Audio interface (using digital inputs) – Mac – Garageband
Not sure how your Mackie board accepts input from DAT. But if its possible, then there are two options:
a.)Master entirely outside your Mac- connect your DAT to your mixer. This DAT serves an an audio input. Connect all outboard gears to your mixer. Then adjust the EQ, compression ,etc until the resulting quality on the mixer main out is sonically perfect. You will then import this to GB on your Mac as digital for finishing touches such as applying limiter or converting to MP3. Allow some headroom probably around -18dB to -6dBFS maximum peak level on GB before limiter. More than that, distortion would start to appear. If the signal level is too low, you can add some gain on the mixer main out and watch out for the peaks make sure the maximum peak should be around -6dBFS. Not sure though if your Mackie board can be connected directly to your Mac. In most cases, I suggest you need a standard audio interface which can be a Firewire or USB that performs the standard analog to digital conversion.
b.) Or simply import the audio directly to your GB. Then do the mastering entirely digital (within your Mac) using plugins. Not sure if GB supports all of these features. Good luck!
Emerson,
Thanks for your helpful advice! The DAT was made a quick reference copy at the end of a session, so I didn’t do much to it in terms of mixing since it was just for my ears. Since I don’t have the original tracks to mix (I just have the composite reference mix) will I be able to master it after I import it into GarageBand? I’m not clear on that one because once it’s in GarageBand my outboard gear can’t really get in between the GB file and wherever it’s going like an MP3. The chain of devices is DAT to Mackie board to MacBookPro.
By the way, even in the reference DAT, the panning, volume levels, etc. are where I want them. I think that when I initially imported the DAT to GarageBand the levels were too low as witnessed by my anemic waveforms. I will definitely check out your blog for more insights. Right now I think I’m going to put the DAT through the board with my outboard gear and into the MacBook Pro with all the bells and whistles as if I were mastering. I don’t see another way to treat the mix after it’s in GarageBand. Any advice is greatly appreciated and I hope this hasn’t been too confusing. Thanks again.
alton
Thanks Alton for writing. If you are remixing a DAT, you are still on the audio mixing process and focus on getting a balanced and great sounding mix. Forget about mastering first. Don’t stop remixing until it sounds great and not crappy anymore.
Then you can start mastering. If you are mastering on Macbookpro, you need to import your mixdown (which is now a single waveform, a summation of all tracks you have mixed before) to GarageBand. You can read the tutorials in this blog, notably the mastering section for all the related mastering tips.
The mastering category in my blog has tons of tips on how you are going to master your work and export it as mp3. You simply need to use the search function. Good luck.
Emerson,
I just checked out your site and love your insights. I am remixing a DAT (I don’t have the original tracks, no longer use the same software or the PC it was created with) and want to make the song sound great. My audio waveform don’t look anything like yours but I can fix that. Mine are anemic. Actually the lower end of sound waves are flat with spikes only on the upper end. Everyone tells me the song is fine, but the “mix” is crappy.
So I have the DAT, a 1604 VLZ Mackie mixer going into a MacBookPro running GarageBand. I have an Alesis 3630 compressor and a Sonic Maximizer as outboard gear along with an ancient Boss 32 band graphic EQ (the EQ I probably won’t use and just deal with what’s on the Mackie board). I’ve used no outboard gear on the initial “crappy” mix and just tightened some things up using the Mackie. I’m monitoring this from Yamaha PA speakers and drummer’s booth iso headphones.
My question, as vague/stupid as it may seem is, how do I master this thing once it’s in the MacBookPro? Am I in a situation where I am mixing and mastering at the same time? The output is going to be an MP3 to my website for downloads, video and for online sales. Thanks for all of your great advice.
Hi Boris,
Yes that will do great. Good luck with your projects.
Hi Emerson,
Thank you so much for that info. Can you tell me if is necessary (for better quality)
down sampling rate and dithering from 24 bits and 48Khz to 16 bit and 44.1KHz with a Voxengo plug-in you suggested, if I use MAC with for example PreSonus Studio One softaware?
Thank you
I’m happy to see that you are dedicated enough to actually monitor your levels with the L2. I can’t stress how important this is with getting a quality master. One additional thing I think can help with the mastering process is being as objective as possible.
When you have mastered a mix, burn a copy of the song on a CD and take it to your car or some other place when you don’t normal mix. That way you won’t be distracted by the meters and you will be able to monitor more as a average listener and not a engineer.
Have a pen and paper ready and write down a “snag” list of how your mix compares to your reference track. Then revise your mix, comparing it to your master again. It may seem daunting how many changes you need to make in your initial master but this process over time will help you reach professional results faster than any other mixing process. Good job on the post!
@Anne:
So many questions and possibilities. Hard to pin it down without knowing more of your setup.
Depending on the setup of your DAW, and how you have your music project setup, you could indeed see a difference in DB peaks. I’ve had that before with my setup.
It could be best to use Adobe Audition, or the like, to master your music. This way you’ll be able to see the actual wave and it’s peaks, etc. Software level meters aren’t 100% accurate, as they tend to be slower in response.
If you have a hardware mixer, you ca use that for level feedback, but you’ll have to make sure the trim levels etc are accurate; basically, making sure that your hardware mixer is showing an accurate DB level, which can take a little while to setup. To do this you’d have to play a constant tone from your software at a sustained DB level and match that DB level on your hardware mixer when it’s played back through it. Use a 0DB tone, make sure your slider (on the hardware mixer) is at 0DB, and then trim until the level meters show 0DB. 😉
Hope you find a solution!
Interesting info on this site. Still scratching my head after 13 months of attempted audio mastering. Doing better now than a year ago. My biggest battle currently is getting my audio levels up to commercial standards. I’m not into the loudness wars as I keep hearing so much about on the net. But I am trying to produce music that can at least be heard when the stereo system, etc. is set on low volume levels. I’m beginning to think a large portion of this problem lies with my digital audio station software. No kidding. I get commercial audio volume levels when my song arrangements are playing through my DAW. After I mix down my song to an audio file that’s when the trouble begins. It’s like I lose 50 to 75% of audio volume after mix down. I don’t get it.
According to my peak/RMS meters. My audio volume bounced from around -8 to around -15 RMS on the song I was working on today. The peak levels generally stayed around -5 to -8. Maybe I’m cutting out too many peaks. I looked at a wave form from one of Boz Scaggs songs the other day. The RMS level usually fluctuated from around -15 to -20+ RMS and the peak levels bounced up to around -1. Even that song’s audio levels were louder than mine to date.
I don’t quite have the hang of using compression. But I have learned a few tricks lately that keeps my audio and master tracks from clipping and distorting. Equalizing isn’t really a problem for me either since I learned enough to eliminate the low end rumble and the unwanted piercing highs from high end frequency instruments. Long story short. If my DAW would mix down audio files at the same volume that it plays in my arrangements. 90% of my mastering troubles would be over.
These are great tips that all mastering and recording engineers should know.please include peak level compression
Hi Francesco,
You find some information relating to your inquiry here: https://www.audiorecording.me/how-to-use-dithering-sample-rate-conversion-src-during-mastering.html
Cheers.
This is a VERY interesting guide! I do apologizie for this question that could be sound very silly, but I did not understand one single point.
I usually burn my own music compilation on CD-r by ripping the tracks (Exact Audio Copy) from the original CD and/or decompressing MP3s all as Wave files/16 bit, then I put all the tracks at the same level by RMS method and burn.
All this processing is made working with Wave file/16 bits.
The question is: Should I convert all the Wave files form CD and the Mp3s at 32 bits, working on them (RMS) and, once I made it and immediatly before the burning, save the processing as Wave files/16 bits and burn it?
Sorry but I am a little bit confused….
Hello Synthesizer Patches,
Your suggested link on parallel compression is fantastic. I will try to test it a lot in the studio.
Cheers
Thanks for this tip that a lot of people do not do when selling their music. I read the above comment and have found this useful link for you on parallel compression that may help if you include a bit in your post.
http://www.hometracked.com/2007/03/31/parallel-compression-for-fatter-drum-tones/
Hi acoosticzoo, thanks for leaving a comment. I have heard a bit about parallel compression, maybe I can include this in the future.
Cheers.
Thanks for Sharing Your Knowledge. You may also like include a paragraph on parallel compression. acoosticzoo.com