Volume automation is one of the quickest methods in controlling the track volume in the mix without the need to edit the waveform or do destructive editing. This feature is supported in Reaper and this is a tutorial on how to use them.
When to use Volume Automation?
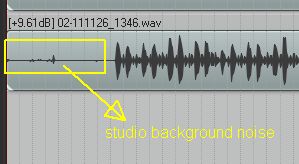
Supposing after recording a guitar track, you are checking the recording and then come up with the following issues with respect to the track volume. The first issue is that there is a substantial background noise before the start of the recording being captured by the microphones, see below:
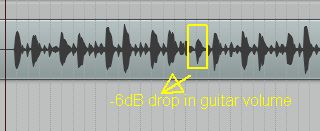
Then later in the track, there is a sudden -6dB drop of volume for one of the guitar chord:
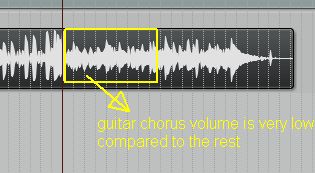
Also the guitar volume in the chorus section is very low compared to the rest:
Finally the end part of the guitar track is not needed and should be faded:

Although the engineer can fix the problems by exporting the track to an audio editor and edit it, the best approach would be to use volume automation. In this method, you will simply automating the changes in the Reaper DAW mixing workspace; and the changes done to the waveform is non-destructive. This implies the original sound recording has been preserved and untouched by Reaper during any volume automation implementation.
Editing the waveform is a destructive approach of editing and could be risky typically if you accidentally overwrite the original recordings and forget to create a backup.
By the way, this is the original sample recording with the above volume issues(observe the first 7 seconds of studio background noise, dropped volume of one E chord and the low chorus guitar volume):


No responses yet