Upsampling is increasing the resolution & sample rate of the original digital audio. Some audio professionals call this “over sampling” although I prefer to call it up-sampling. For example, if the original audio is 16 bit/44.1Khz. If you like to convert it from 16 bit/44.1Khz to a higher resolution such as 32-bit float/96Khz; the process is called “up-sampling”. Upsampling is important in audio editing process particularly in audio mixing and mastering. The primary reason is that digital effects (used by the software plug-in or built-in with your recording software) introduced some kind of unwanted artifacts or distortion during audio processing. This audio processing can be compression and other non-linear editing. This will produce some aliasing effects on high frequency components of the original signal.
Demonstration of how artifacts are generated in a 16-bit/44.1Khz digital audio when applied with effects:
1.) Launch any recording software, (for example I use Adobe Audition).
2.) Go to Edit view, and go to File – New, Create new waveform. Assign sample rate and bit depth of 16-bit and 44.1 KHz. Select mono.
3.) Generate a 10 KHz sine wave tone. Go to Generate – Tone. Under “Flavor”, select Sine.
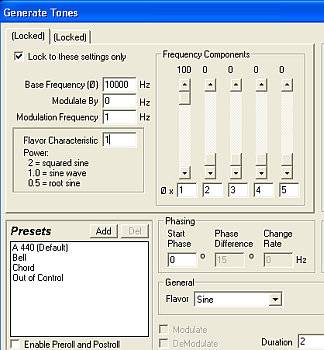
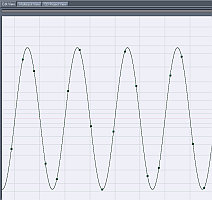
4.) Click OK and zoom, you can then see the sine wave generated at audible frequency of 10 KHz. See screenshot:
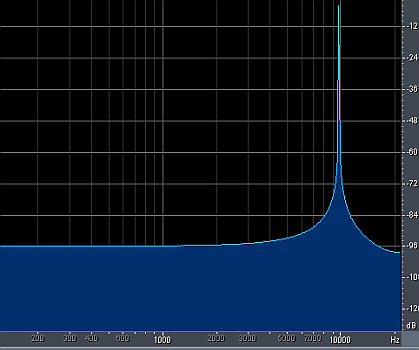
This is also the original signal frequency spectrum before any effects are applied:
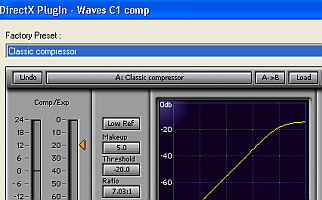
5.) Now let’s apply compression to this 10 KHz sine wave at 16-bit/44.Khz resolution. For this example, I will be using the Waves C1 compressor. Select the entire wave and apply “Classic compressor” preset. Press OK.
6.) Select the entire wave and do Fast Fourier Transform (FFT) analysis. This will let you view the entire signal frequency spectrum to assess whether there are artifacts or side-effects generated by the compression. In Adobe Audition 1.5, this can be done by going to Analyze – Show Frequency Analysis. Select the maximum FFT size (65536) and use Blackmann-Harris. Finally click “Scan”. This is the result when compressing directly a 16-bit/44.1Khz sine wave (10 KHz tone).
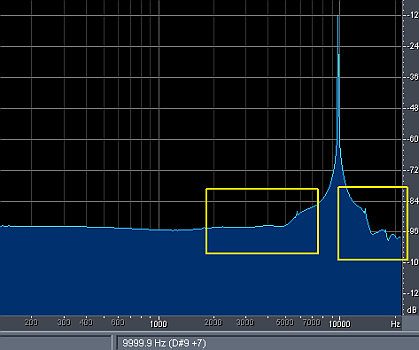
Enclosed in yellow boxes are the artifacts generated by the compression. These are unwanted results or it’s also called “quantization distortion”. In real music, this will have an effect of degrading the audio quality particularly if you are over-processing a 16-bit/44.1Khz digital signal with a lot of effects or compression.


4 Responses
Hi Carlo,
I am glad to know my tutorials are working well for your project. Thanks for your support!
Hi Emerson,
I really don’t know what to say.. Your website, your tips & your tutorial from mixing to compression, to mastering, to everything are literally & completely changing the quality of my music. Simple things to do that make all the difference in the world. I had mastered a song and it was ok, then I read this tutorial and applied to the file. Then I reloaded the SAME mastering rack to the upsampled song and.. wow, it was like coming from another planet.
Thank you wholeheartedly, also for replies to emails I sent you quite ago. I won’t miss to recommend your site to my friends whenever they’ll need.
Cheers!
Brenny,
Thank you, I’m glad you find it useful. Cheers.
Excellent Article..!!
no words to express my Gratitude..!!
a “small” milestone to Mastering!!!