If you are doing some audio mastering using Adobe Audition, this tutorial will help you find some great tools that you can use in your mastering. There are lots of tools available, some are built-in to Adobe Audition while others can be added via DirectX or VST plug-ins.
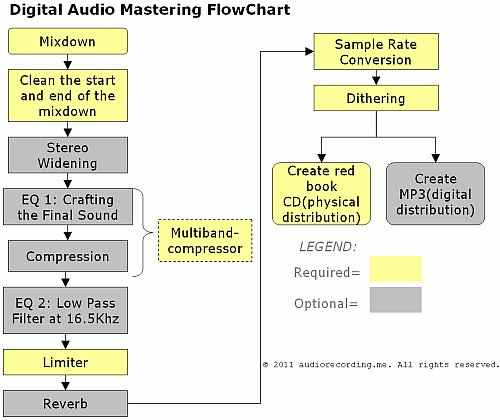
Some of these tools are not free, so you need to license it before it can be fully operational in Adobe Audition. These are the tools that I am using in my home audio mastering. And I will explain in details some of my tips and favorite settings. But first, below is the audio mastering flowchart I am using:

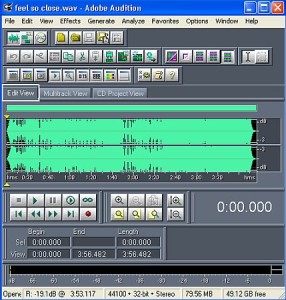
The input of the mastering stage is the 24-bit/96KHz WAV mix down file from the audio mixing process. The first step is the cleaning of the audio file, so there are no strict tools that I am using with this procedure. You can simply cut the extra beginning and end time so that the entire length is reasonable. You can read more details about here.Take note that all the mastering is done in Adobe Audition Edit view:
Tools/Plugins #1: Adobe Audition Stereo widening Effect
In Adobe Audition, go to Effects – Amplitude – Pan/Expand. My favorite preset is “Mastering Width”.
When to use stereo widening in mastering? This is very helpful if you find the left and right panned instruments to be weak compared to the instruments at the center. Supposing the vocals is too strong in the center while the guitars are deeply buried in the background. You can use stereo widening effect to balance the volume. The effect is that the guitar volume will be brought up to a comparable level to the vocals.
Tools/Plugins #2: Multiband Compressor
Personally I am using the Waves LinMB (Linear Phase Multiband compressor). This is a plug-in so this means you need to install this first to your Adobe Audition software before using it.
When to use multiband compressor?This tool allows you to apply both compression and EQ in the same tool. Compression and EQ are two very important factors in shaping the final sound in the mastering process. You can read these following tutorials for details about this subject:
Waves Linear Phase Multiband Compressor Introduction
Using reference tracks when mastering using Linear Phase multiband compressor
Tools/Plugins #3: Adobe Audition Parametric Equalizer
This is a built-in tool in Adobe Audition. To use this EQ, go to Effects – Filters – Parametric Equalizer.
When to use Parametric Equalizer? If you like to shape the sound of your audio, you need to use Parametric EQ. You need to assign two settings and that is the amount of cut/boost as well as the Q. If you search for mastering EQ tutorials in this blog; all settings can be implemented using parametric equalizer.



No responses yet