This is an important tutorial for Ardour which is a Linux-based digital audio workstation. In audio mixing, you will be applying several effects that could improve the clarity and presence of your tracks. Example of these effects are EQ, compression, etc. This tutorial already assumes you have completed recording/tracking your tracks and that the only problem is how to start mixing it. Also this assumes you have a fully working installation of Ardour in your Linux or Mac operating system. This means everything should be working including JACK in Ardour. These are the steps:
Prepare your Tracks and Create Ardour Sessions
1.) Prepare your recorded tracks. For the purpose of illustration, download these test audio wav files that will be used in this tutorial.
2.) Extract the zip file. Inside the ardoursamples folder, you will find two wav files namely chorus bass.wav and kickdrum.wav. The format of this audio wav files is 24-bit/48KHz which is compatible with Ardour.
3.) Launch Ardour.
4.) Under “New Session”, name it as ardourmixingtutorial to save the project and click “New”.
5.) Let’s import these two wav tracks to Ardour for mixing. Go to “Session” – “Import”. Under “Add Existing Audio”, locate the kickdrum.wav and then click OK.
6.) Also import chorus bass.wav to your mixing session in Ardour.
7.) Move these two tracks at the beginning of the session. This is how it looks like after moving the tracks to the start:
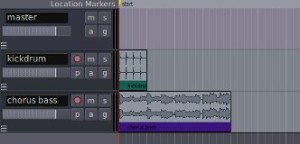
8.) Right click over kick drum audio wave, go to “kickdrum” – “multi-duplicate” – and set the number of duplications to 7. This will duplicate the kick drum clip 7 times. This can be very useful for beat/loop generation.
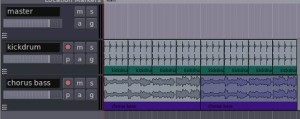
9.) Now right click also on chorus bass audio, go to “chorus bass” – “multi-duplicate” – set the number of duplications into 1. This is how it looks like with sample clips duplicated in Ardour session:
10.) Save the changes you have implemented in your Ardour session. Go to “Session” – “Save”.
Controlling the Peaks on Master Fader
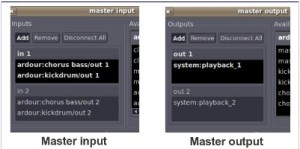
11.) Try playing the session, you should hear the music out of your studio monitors. If you cannot hear any audio output; make sure you properly route your tracks to Ardour master channel. Go to “Window” – “Show Mixer”, and go to “Master”. Make sure the master input and master output looks like this:
12.) If you can hear some audio, look at your master fader. This is how it looks like:
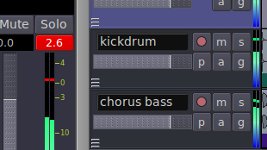
As you can see, the master audio clips at +2.6dB. In digital audio, the maximum peak allowed is only +0dB; beyond that its called clipping (as shown it’s red) and can cause distortion. So you need to decrease the volume in the master fader until it will hover around -6dB to -3dB (put more headroom to your mix).
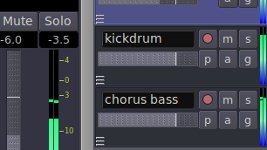
Based on the screenshot, the master fader was adjusted from 0 to -6dB, so that the peak on the master will hover around -6dB to -3dB (-3.5dB on the screenshot).
Adding Effects to your Mix
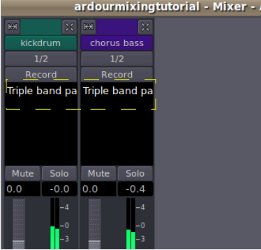
Read this tutorial on how to add, use and install Ardour plugins in Ubuntu. Follow the procedure in that tutorial and add “Triple Band Parametric” on on the pre-fader section of kick drum and chorus bass tracks. To confirm if you have correctly added the plugin, go to Windows – Show Mixer. You should see the Triple Band parametric effects plugin added on both kick drum and chorus bass track. Screenshot (enclosed in dotted yellow box):
Configuring EQ settings in Mixing
1.) Let’s apply the following EQ setting:


No responses yet