
If you want zero cost DIY mastering, then the only option is to use open source audio editing software such as Audacity and Voxengo R8brain. Let us make this tutorial very simple for you as I assume you are in desperate need to self-master your work.
Step1.) Get the source audio in right format for mastering
a.) The recommended format for audio in mastering is as follows:
1.) 24-bit/48KHz WAV stereo mixdown– minimum
2.) 24-bit/96KHz WAV stereo mixdown
3.) 24-bit/192KHz WAV stereo mixdown
When can you get this format right on the first place? The answer is during the mixdown. When an audio mixing engineer performs a mixdown; where all tracks are bounced to stereo; make sure the saved format are using any of the above specifications. Never use 16-bit/44.1KHz WAV or an mp3 file as an input in mastering because it won’t sound good even with upsampling.
b.) Make sure the input wav file for mastering does not clip beyond 0dBFS. The maximum peak should somewhat lies between -3dBFS to -6dBFS.
c.) There should be no compression applied after the mixdown. Compression can be done later in the audio mastering stage.
Step2.) Apply Multiband compression
Multiband compression is important in mastering because it controls the peaks of each frequency bands to its limits. You can also EQ problematic bands. In short, a multiband compressor can be used to apply EQ and compression at the same time. However, there is no built-in multiband compressor in Audacity. Follow the steps below to install:
a.) Go to this page and click version 1.2.11 download link on Windows.
b.) Extract the zip file: c3multibandcomp_1_2, these are the files inside this folder:
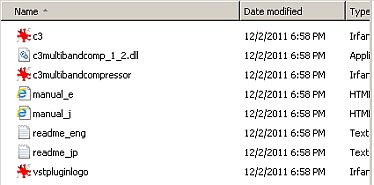
Audacity multiband compressor
c.) Go to this folder and cut c3multibandcomp_1_2 then paste to Audacity plug-ins folder.
d.) In Audacity, go to preferences – Effects – then check “Rescan VST effects next time Audacity”.
e.) Close and exit Audacity. Restart it; you can then use the plugin.
How to use the multiband compressor?
1.) Plot the spectrum first to see the overall response of the audio to be analysed. Go to Analyze – Plot Spectrum. Ignore the warnings and proceed. Use the “log” option to fully see the bass response. For example this is the result:
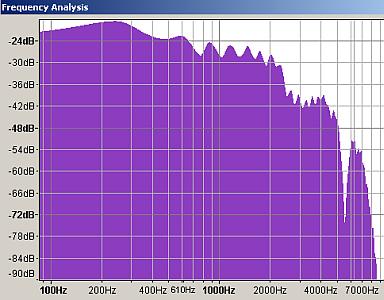
Plot spectrum for mastering
2.) Let’s start with the bass. It averages around -24dBFS, so if the bass seems out of dynamics (large difference between strong and soft like an unsteady bass drum beat or uneven bass response), then you might want to lower down the threshold (below -24dBFS, e.g. -30dB) and apply appropriate compression settings to control them. Do this technique also in setting thresholds for mid and high. For attack time, release time, the following settings are recommended as a start:
Low band:
Compression ratio: 1.5:1
Attack time: 100ms
Release time: 900ms
Mid-band:
Compression ratio: 1.5:1
Attack time: 50ms
Release time: 300ms
High-band:
Compression ratio: 1.5:1
Attack time: 25ms
Release time: 100ms
Another important to note is the amount of gain reduction in each band. The compression ratio affects the sound because a high compression ratio compresses the audio harder and reduces the gain substantially than a slight compression. This is the formula for computing the gain reduction:
Gain reduction = Threshold – Threshold/Compression ratio
So if you are applying -30dB threshold at 1.5:1 compression ratio, the gain reduction on that band is:
Gain reduction = -30 – (-30)/ (1.5) = -10dB, now I consider this a slightly heavier compression. Use your ears to assess how the gain reduction on each band is affecting the overall sound. This is the key to successful mastering. If you want to compress just a little (like you need only a 5dB reduction in sound of that band), then you might lower down the compression ratio to 1.2:1.
3.) Once the sound dynamics in all bands are fully controlled, you can then apply gain on each band for flat equalization. For example it lacks so much mid band presence, you might want to add more gain on the mid.
Step3.) Normalize and Sample Rate Conversion
I am not a fan of making recordings too loud, instead I simply normalize them to preserve the dynamics generated from the mix (this is very important). If you really want to make it loud and sacrifice dynamics, you can use a combination of hard limiter and amplification although I will not cover it here.
To normalize, simply select the entire wave and check all options and set it to -0.2dB. This increase the volume of the mastered track while retaining the dynamics perfectly.
Finally what you have right now is the highest resolution master of your work (e.g. 24-bit/48KHz WAV or 32-bit float/96KHz depending on what you are using, see previous section). But if you want to sell your work as MP3 or CD audio, you need to change the format to 16-bit/44.1KHz. In this case, you will use Voxengo R8brain sample rate converter and dithering application. Download the stand-alone version.
Launch R8brain and configure settings like below (assuming you are converting 32-bit float audio/96KHz to 44.1 KHz/16-bit):

Audacity R8brain
Now you can then use LAME Mp3 to convert the CD audio wav 44.1 KHz/16-bit to mp3.
Content last updated on June 20, 2012