This is a short guide on how to do mastering using Cool Edit Pro (now called Adobe Audition). Particularly, this is written based on older Adobe Audition 1.5. But I do believe the techniques outlined here can also be applied to later Adobe Audition versions such as Adobe Audition 3.
Mastering is the last stage of the audio production process, next to mixing. So make sure that before you start mastering, your audio wave must pass the following properties:
1.) It is a mix down wave. This is single waveform, which is summation or the final result of the mixing process. It should only be one waveform but containing all musical instruments mix (vocals, drums, guitars, etc). See examples below:
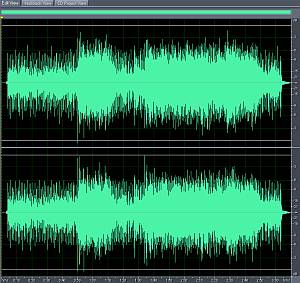
Sample photo of the audio mixdown after mixing process
2.) No EQ and Compression is still applied. It should be completely fresh, the single waveform is still NOT being adjusted with any mastering EQ and compression settings.
3.) The maximum peak of the audio wave (Peak amplitude) should not exceed -3dB. An allowance is needed for EQ and Compression adjustments in mastering. If the wave is already peaking at the loudest level (0dB), then there is no room for EQ and Compression adjustments.
It is a good practice in mixing that the completed mix down should have some headroom for EQ/mastering adjustments. You can measure the peak amplitude by going to Edit View –> Analyze –> Statistics.
For details, read this tutorial on the specifications of your audio mix required before mastering.
Step1. Trimming of start and ending. I give a 0.3 second allowance before the start of the audio wave and 0.6 second allowance at the end of the wave. If the wave exceeds 0.3 second from the moment it started playing, cut it. Below is the sample screenshot of the trimmed wave at the start (it was exceeding 0.3 seconds before and I cut it to 0.3 seconds standard).
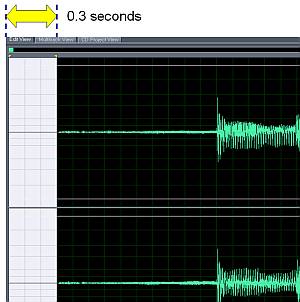
Start of the audio wave trimming
Step2. EQ stage – The objective of EQ stage is to shape the final sound of the recording, apply presence, boost hi frequencies and lows as well as removing muddiness.
Use the Adobe Audition Parametric Equalizer to adjust settings. You can as well apply EQ plugins like those from Wave. Refer to this following good tutorial on mastering EQ using Audition:
EQ Settings for Mastering
How to use a parametric equalizer
Step3. Compression stage – The overall objective of the compression stage is to make the audio wave as loud as possible without creating distortion. In this case, I am using the L2 Waves plug-in for Adobe Audition 1.5:
Go to Effects –> DirectX –> Waves –> L2 and adjust the following:
Under factory preset change to: Hi Res CD Master then adjusts the following:
Threshold: -7.5
Out of Ceiling: 0.2
Click OK, this will maximize the volume of the recording to around -13dB (average RMS power) which is considered OK for master recordings. You can check the loudness in terms of average RMS power by Analyze –> Statistics.
Fine tune the mastering and use your ear. You can use this technique to remember your settings in the mastering FX chain.
Bear in mind that mastering in Adobe Audition is a destructive audio editing process, so make sure you have backup the original mix before you proceed.