Purchase and License Reaper
If you are ready to use Reaper for full-time, registering and purchasing a license is important. You will get the benefits of upgrades as well as supporting Reaper to continually develop its product. To do this, follow the steps below:
1.) Go to the purchase page.
2.) You have 3 options to pay, either by PayPal, FastSpring and Money order/Check.
3.) Let’s use the discounted license. Click “Discounted License $60” button.
4.) Again there are two options, either you use an existing PayPal account or Pay with a credit card. For convenience, let’s pay with a PayPal account. Click “Have a Paypal account?”
5.) You will then ask to login to your PayPal account; enter your login and password.
6.) Paypal will then present the payment methods based on the availability of funds in your account. If your Paypal balance is 0 then PayPal will get the payments from your credit card or bank account.
7.) If you see this confirmation message on the Reaper site (after clicking “Pay Now” button in Paypal): Thank you for your purchase! , you have successfully purchased a license and then check your email.
8.) You will be receiving two emails, one from Paypal confirming your payment and the other from Cockos containing your license. Open the email that contains your license key.
9.) After opening the email, download the attached file of the email. This is your license key file. It uses a .rk extension. The filename is reaper-license.rk; download it to your Desktop.
10.) Launch Reaper, in the opening window click the button: “Import license key”.
11.) Browse to the reaper-license.rk file in your Desktop. Select the file and then click Open. It will then show your name as well as the type of license you have, see screenshot below:
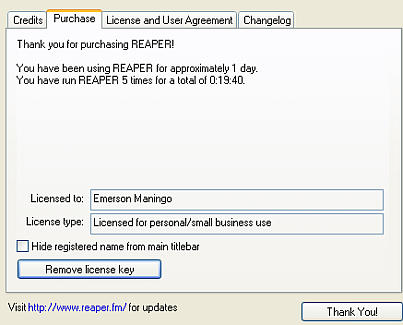
Reaper DAW license key
12.) Finally click the “Thank you” button. You have successfully licensed Reaper.
Content last updated on August 7, 2012