If you want zero cost DIY mastering, then the only option is to use open source audio editing software such as Audacity and Voxengo R8brain. Let us make this tutorial very simple for you as I assume you are in desperate need to self-master your work.
Step1.) Get the source audio in right format for mastering
a.) The recommended format for audio in mastering is as follows:
1.) 24-bit/48KHz WAV stereo mixdown– minimum
2.) 24-bit/96KHz WAV stereo mixdown
3.) 24-bit/192KHz WAV stereo mixdown
When can you get this format right on the first place? The answer is during the mixdown. When an audio mixing engineer performs a mixdown; where all tracks are bounced to stereo; make sure the saved format are using any of the above specifications. Never use 16-bit/44.1KHz WAV or an mp3 file as an input in mastering because it won’t sound good even with upsampling.
b.) Make sure the input wav file for mastering does not clip beyond 0dBFS. The maximum peak should somewhat lies between -3dBFS to -6dBFS.
c.) There should be no compression applied after the mixdown. Compression can be done later in the audio mastering stage.
Step2.) Apply Multiband compression
Multiband compression is important in mastering because it controls the peaks of each frequency bands to its limits. You can also EQ problematic bands. In short, a multiband compressor can be used to apply EQ and compression at the same time. However, there is no built-in multiband compressor in Audacity. Follow the steps below to install:
a.) Go to this page and click version 1.2.11 download link on Windows.
b.) Extract the zip file: c3multibandcomp_1_2, these are the files inside this folder:
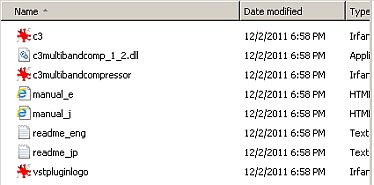
Audacity multiband compressor
c.) Go to this folder and cut c3multibandcomp_1_2 then paste to Audacity plug-ins folder.
d.) In Audacity, go to preferences – Effects – then check “Rescan VST effects next time Audacity”.
e.) Close and exit Audacity. Restart it; you can then use the plugin.
How to use the multiband compressor?
1.) Plot the spectrum first to see the overall response of the audio to be analysed. Go to Analyze – Plot Spectrum. Ignore the warnings and proceed. Use the “log” option to fully see the bass response. For example this is the result:
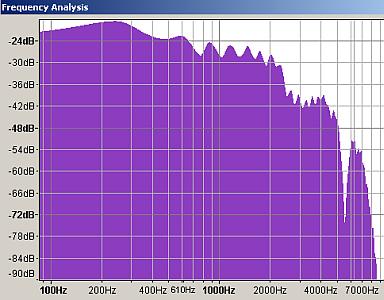
Plot spectrum for mastering
2.) Let’s start with the bass. It averages around -24dBFS, so if the bass seems out of dynamics (large difference between strong and soft like an unsteady bass drum beat or uneven bass response), then you might want to lower down the threshold (below -24dBFS, e.g. -30dB) and apply appropriate compression settings to control them. Do this technique also in setting thresholds for mid and high. For attack time, release time, the following settings are recommended as a start: